Connecting ProLiant and Alice

Setting Up Alice in ProLiant
This guide walks you through the two steps needed to connect Alice with ProLiant for benefits administration.
The phone number and email address provided below are for internal payroll purposes only. If you need to reach our team, please call or text us at (929) 552-4625.
Overview
- Set up Alice as an Admin — Create Alice's user account with the correct permissions
- Add the Deduction Codes — Add the four required parking and transit codes
Part 1: Set Up Alice as an Admin
Use the following credentials when creating Alice's account:
- First Name: Alice
- Last Name: Financial
- Email: alice@thisisalice.com
- Phone: 917-336-9115
- Password: Alice user1!
Steps:
-
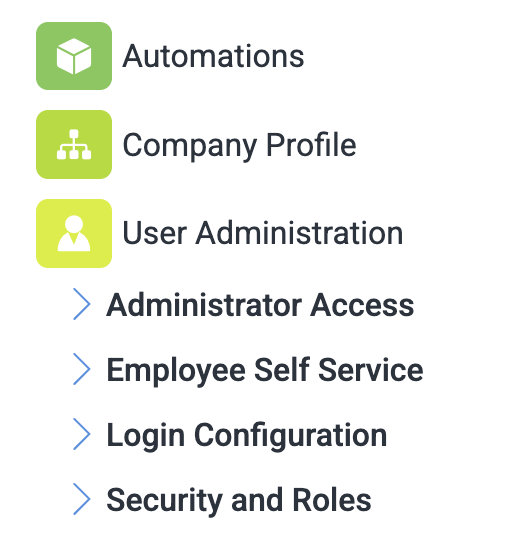
Log in to ProLiant, click the Gear in the top right corner, go to User Administration, and Administrator Access

- Click Add.
- Role Type: Skip ESS (Employee Self-Service) — that's for employee password resets and is not needed.
- Security Role: Administrator
-
Company: Select the relevant company/paygroup(s) for this client. If they have multiple companies in ProLiant, select all that apply.
Note: If additional companies are added later, you'll need to return and grant Alice access to each new one.
Fill in the following user details:
- First Name: Alice
- Last Name: Financial
- Password: Alice user1!
- Cell Phone: 917-336-9115
-
Email: alice@thisisalice.com
Click Save, then work through the permissions screens:
- Payroll schema (payroll codes) — keep enabled
- Reports — keep enabled (required)
- Benefits — keep enabled (needed for benefit codes)
- Hide bank information — yes, hide it
- SSN / pay rate — keep visible (needed for eligibility)
- HR — leave as-is for now; head of payroll can review and trim if needed
- No custom role needed
- Under Available Companies, confirm the correct company is checked, then click Save.


Part 2: Add the Deduction Codes
Navigate to the Deduction Codes screen:
-
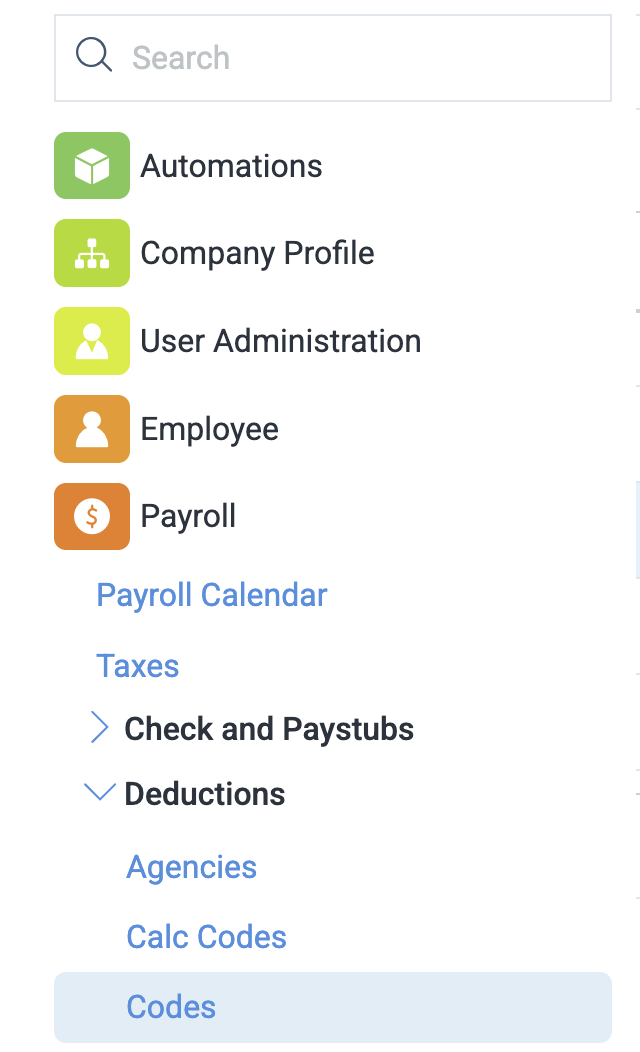
Click the Settings gear icon in the top right corner.
-
In the left-hand menu, go to Payroll → Deductions → Codes.
- Click Add New and enter the settings for each code below. Repeat for all four codes.

Once all four codes have been added, the Codes list should look like this:

PRKAD — Parking Addition
- Code: PRKAD
- Description: Parking Addition
- Type: Add - Add
- Show on Check: Y - Yes
- Calc Code: Flat
- Checkboxes: Auto Drop, Partial Drop, and Active should be checked — all others unchecked
- Taxability, Override Setup, and Other Options: Leave as-is
TRAAD — Transit Addition
- Code: TRAAD
- Description: Transit Addition
- Type: Add - Add
- Show on Check: Y - Yes
- Calc Code: Flat
- Checkboxes: Auto Drop, Partial Drop, and Active should be checked — all others unchecked
- Taxability, Override Setup, and Other Options: Leave as-is
PTPRK — Pretax Parking
- Code: PTPRK
- Description: Pretax Parking
- Type: 125 - 125
- Show on Check: Y - Yes
- Calc Code: Flat
- Checkboxes: Auto Drop, Partial Drop, and Active should be checked — all others unchecked
- Taxability, Override Setup, and Other Options: Leave as-is
PTTRA — Pretax Transit
- Code: PTTRA
- Description: Pretax Transit
- Type: 125 - 125
- Show on Check: Y - Yes
- Calc Code: Flat
- Checkboxes: Auto Drop, Partial Drop, and Active should be checked — all others unchecked
- Taxability, Override Setup, and Other Options: Leave as-is
Please email payroll@thisisalice.com once this is complete.